
-Originally published by our sister company PaulB Hardware
Turning a portion of your land into a food plot can transform your hunting game, but only if it’s a dependable source of supplementary food for deer. When done right, a food plot can attract a considerable number of deer to feed on its crops. But too often, food plots aren’t properly maintained and become fields of weeds instead of sites for wildlife.
To make sure that doesn’t happen to your plot this hunting season, you’ll want to consider how to properly plant a food plot, deer food plot tips, why food plot sprayers are important along with how to choose and use a sprayer.
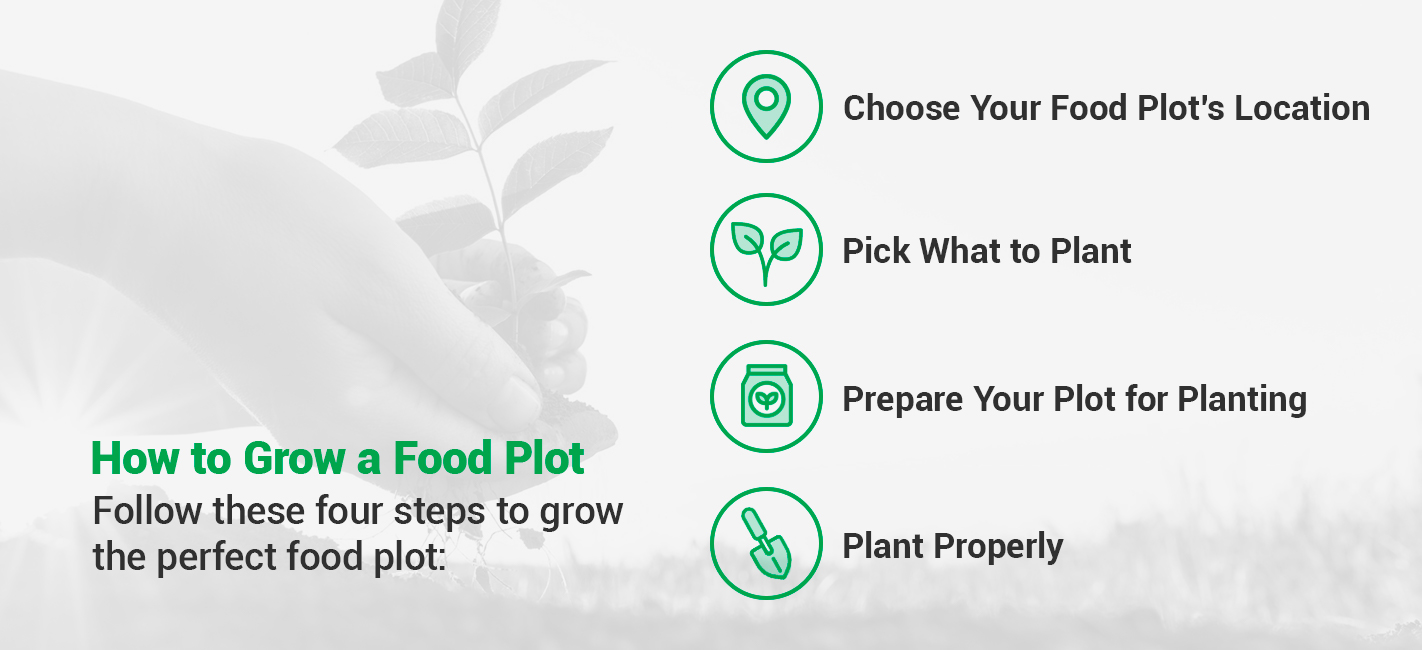
How to Grow a Food Plot
Whether you’re growing a food plot to view or hunt deer, it’s important to realize that even the best food plot cannot offer complete nutrition for deer. The wildlife will need more of a variety of foods than your food plot can sustain, and there’s no easy way for you to plant a diversity of crops that mature at different times. For this reason, you’ll need to think through and strategize your food plot planting.
Follow these four steps to grow the perfect food plot:
1. Choose Your Food Plot’s Location
Location is one of the most important factors in planting food plots. If the food plot is not in an area where deer can feel safe, such as near tree coverage and large foliage, they won’t be attracted to it. Choose a spot that’s close to a source of refuge for animals, like a forest, so the deer are more likely to use it.
Along with location, the size of your food plot also matters. A food plot should be a minimum of 300 square feet in order to support wildlife. If you also plan on providing animals with winter cover, you’ll need an even larger area of land.
2. Pick What to Plant
When choosing which seeds to plant in your feed plot, think about whether your goal is to attract and hold deer year-round or to focus on a particular time of the year. In general, food plots thrive the most during the colder months, meaning “cool-season” crops, such as legumes, grains and brassicas may be best. Within those larger categories, deer tend to enjoy clovers, winter wheat, winter peas and oats the most.
You’ll also need to take the physical characteristics of your food plot site into consideration before deciding what to plant. Details about your land, such as its soil type, slope and equipment accessibility, will influence what kind of crops you’ll be able to plant. Some seed blends are hardier than others and can tolerate drought, while others need a specific soil type and slope to survive.
The majority of seed blends available need to be planted in a food plot that’s been prepared with equipment, so make sure you choose accordingly. Ensure you’ve picked the right seeds for your soil and purposes before moving to the next step, so you can pick the right fertilizer for your seed blend.
3. Prepare Your Plot for Planting
Once you’ve settled on a location and a crop plan, you’re ready to check out your food plot’s soil. You need to know the quality of your soil before beginning to plow or you may risk planting your crops in nutrient-lacking soil and reducing their maximum yields. Test your seedbed’s soil to make sure it has a pH level around 6.5.
You may be able to use a soil pH test kit from your local gardening store for these tests, but their readings are often unreliable. Because soil pH is one of the most important factors in determining a successful crop, you’ll want to make sure you get a precise reading. To properly test your soil, find the cooperative extension services in your state for a free in-depth analysis of your soil quality and advice about adjusting it if necessary.
Once you’ve achieved a solid pH level for your soil, you’ll need to remove existing vegetation from the feed plot to make room for your crops. Keep in mind that the more existing vegetation you’re able to remove, the better the forage will perform. Prepare your feed plot’s soil with a tractor, corn planter or drill and a disk. Then, add fertilizer according to the soil’s needs as specified in its test report. Sprinkle the fertilizer just before planting to ensure the fertilizer is at full strength when the seeds start to sprout.
4. Plant Properly
Now, you’re ready to start planting the seeds. Be sure to plant your seeds at the right depth based on their size — larger seeds should be covered under a thin layer of soil, while smaller seeds should be left uncovered on top of the seedbed.
The Importance of Spraying Your Food Plot
After you’ve worked hard to prepare your food plot, you’ll want to protect your investment from getting ruined by weeds. The term “weeds” includes any plant that was not intentionally sown where it’s growing. Weeds interfere with human activity in a way that is considered unwelcome, competitive, persistent and pernicious. They can cut into your crops’ food supply or attach themselves to crops’ roots to leach their nutrients, causing them to die.
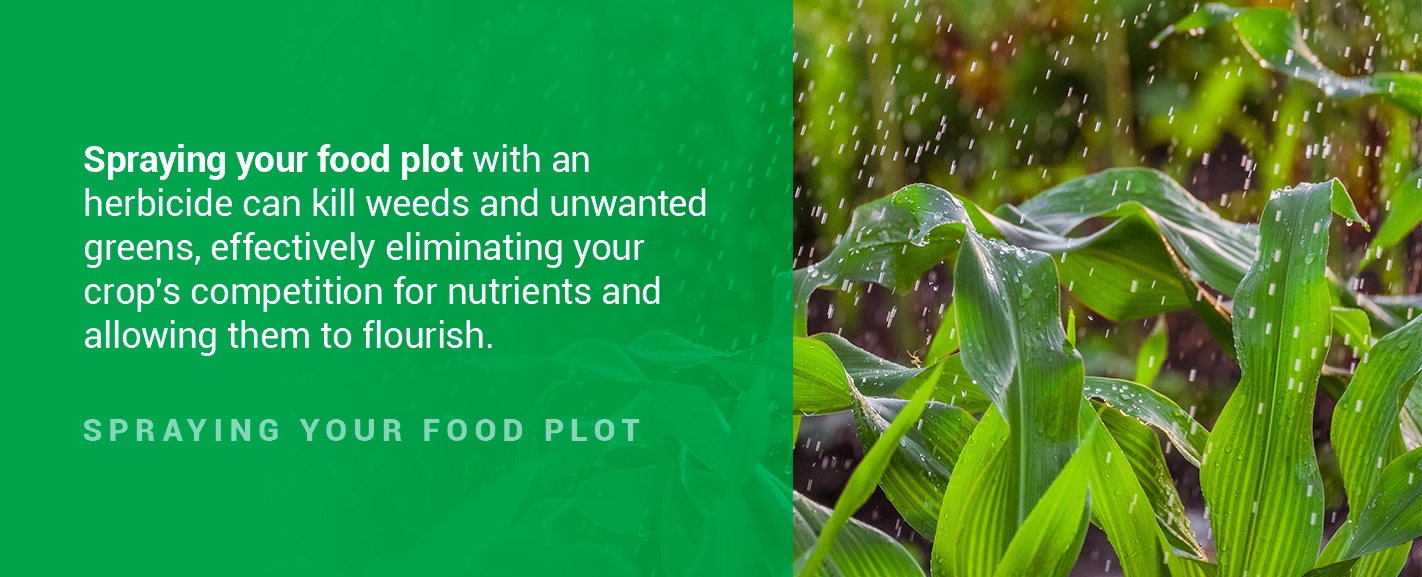
Left unattended, weeds can start taking over crops’ space and become an invasive species. Mowing and hand-pulling weeds can only get you so far. Spraying your food plot with an herbicide can kill weeds and unwanted greens, effectively eliminating your crop’s competition for nutrients and allowing them to flourish. To see the most benefits, try spraying your crops two to three times per year.
It’s also important to learn how to spray your crops correctly so you don’t contribute to glyphosate resistance — using a too concentrated or overly strong variation of a food plot herbicide can build up a weed’s tolerance to it. The goal is to finely mist weeds, not drench them, which is accomplished by spraying herbicides at a higher pressure to create smaller droplets. Small droplet size is also more desirable because coverage generally increases as drop size decreases.
Using a high-pressure setting with a smaller droplet size is good for avoiding drenched weeds, but it may lead to issues with drift. Smaller particles can be blown off-target because they take longer to fall than larger ones. Small droplets also dry quicker than larger ones, meaning the wind can easily blow the evaporated chemical residue in the wrong direction.
For safety reasons, manufacturers are beginning to print drop-size regulations on their labels. Make sure you read your herbicide’s label before spraying to ensure you’re within the acceptable drop-size range. Following these guidelines can save you from accidentally spraying off-target while still achieving optimal crop coverage and weed control.
How to Choose a Food Plot Sprayer
A food plot sprayer is an essential piece of equipment for covering the entirety of a food plot in a short amount of time. Using a food plot sprayer will also give you more control over how your herbicide is spread and its droplet size. There are many factors that go into choosing a food plot sprayer, such as plot size, sprayer size, boom or boomless configurations and other sprayer features. We’ll talk more in-depth about these factors below.
1. Plot Size
If you have a smaller-sized food plot, you might be able to get by with a gallon-sized handheld or backpack sprayer, but most food plots are the right size for a UTV or ATV food plot sprayer. These sprayers’ capacity range from about 25 gallons-60 gallons, which is large enough to quickly and efficiently cover a standard-sized food plot without costing as much as a tractor. Because they attach to an ATV or UTV, these sprayers are also great for navigating food plots with rough terrain or in difficult-to-access areas.
2. Sprayer Size
The sprayer size you need will depend on the size of the area you’re trying to cover and your budget. Make sure you accurately measure your food plot before deciding what size sprayer you need. If you have a lot of ground to cover, a larger spraying apparatus could be a smart investment. You may not have to buy your food plot sprayer either — most local agriculture stores have them available to rent.
For those who need to cover a lot of acreage, the 3-point food plot sprayer is your answer. A 3-point food plot sprayer is one of the more heavy-duty sprayers available for food plot management and is able to hold hundreds of gallons. And thanks to its 3-point hitch attachment mechanism, it can connect to your spraying equipment easily.
3. Boom vs. Boomless
Sprayers are either designed to spray with a boom or in a boomless configuration:
- Boom sprayer: A boom sprayer has an extended rod, or boom, with nozzles spaced out along its edge. Each nozzle releases a mist in a fan shape that overlaps with the adjacent nozzle to achieve complete coverage. The nozzles are pointed directly toward the ground to reduce the chance of drift.
- Boomless sprayer: A boomless sprayer has just one or two upright nozzles that spray the herbicide upward in a fan-like pattern. This configuration uses a similar effect to placing your thumb on a hose spout to increase its reach and cover a wide area.
Some food plot growers favor boomless sprayers for their simplicity. Boomless sprayers are also good for spraying along rough terrain that could damage a boom. A boom sprayer typically delivers better spray coverage, is more precise and isn’t as influenced by the wind. By cutting down on drift and giving you control over what gets sprayed and what doesn’t, a boom sprayer also allows you to plant a variety of crops that can tolerate different types of herbicides.
4. Sprayer Features
Other features that affect the performance of your food plot sprayer are its nozzle and pump. Depending on what type of pump your sprayer has, the strength of its nozzle pressure will change. Because the nozzle’s output volume is based on the sprayer pump’s specifications, picking the right pump is crucial.
Here are a couple of the more popular sprayer pumps to choose from:
- Diaphragm pumps: By using synthetic diaphragms to propel fluids, diaphragm pumps are able to maintain separation between strong chemicals and sensitive pump components.
- Roller pumps: As the name suggests, roller pumps rely on internal rollers to drive the spray fluid. Roller pumps work well with a variety of fluid types and quantities while being low-cost and relatively simple.
How to Use a Food Plot Sprayer
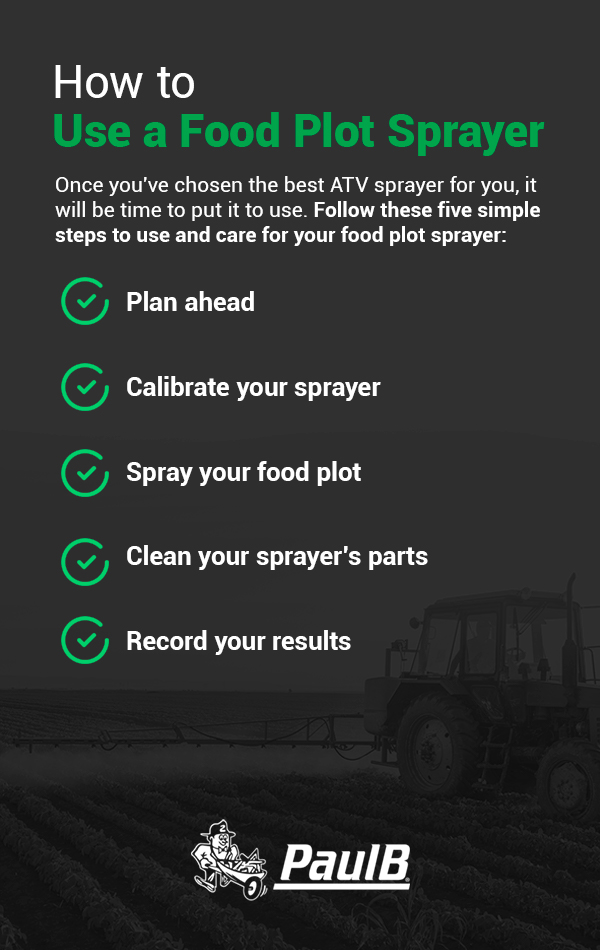 Once you’ve chosen the best ATV sprayer for you, it will be time to put it to use. Follow these five simple steps to use and care for your food plot sprayer:
- Plan ahead: Always read the label of the pesticide you intend to use so you know which nozzle to use for the proper pressure-volume and your food plot receives the right amount of spray. Try to plan ahead and spray during the prime growing season for weeds on a day with low wind to minimize drift.
- Calibrate your sprayer: Take time to calibrate your sprayer correctly. Going through this process will ensure your spray is delivered at the right rate and yields the best results. Make sure you test your sprayer’s functions by putting straight water through it before adding any chemicals to its tank.
- Spray your food plot: Depending on your pressure and sprayer nozzle sizes, drive at about 5 mph-7 mph while spraying your food plot and overlap by about one foot on each pass.
- Clean your sprayer’s parts: Cleaning out your sprayer’s tank is key for keeping chemicals from corroding the inside of it and avoiding accidentally spraying leftover chemicals the next time you use it. Thoroughly wash the sprayer’s tank, hose and nozzles with water and a detergent-based tank cleaner after each use. Follow a triple-rinse system to ensure your food plot sprayer’s tank really gets clean.
- Record your results: Keep a log of each spraying technique you attempt and its results to keep track of what works best for your food plot and how to replicate the procedure next time.
Once you’ve finished using your food plot sprayer for the season, be sure to flush its tank out completely and protect it from winter freezes by running a few gallons of antifreeze through its system. Keep any insects from crawling into its nozzles by covering them with plastic bags.